Confirming receipt: the goods arrived
You ordered something and it arrived, or the service was provided? Report it in Anant. This creates a receipt, and the order can move on to payment.
Open "הקבלות שלי"
Log in to Anant. On the רכש (Procurement) tab click הקבלות שלי (My receipts).
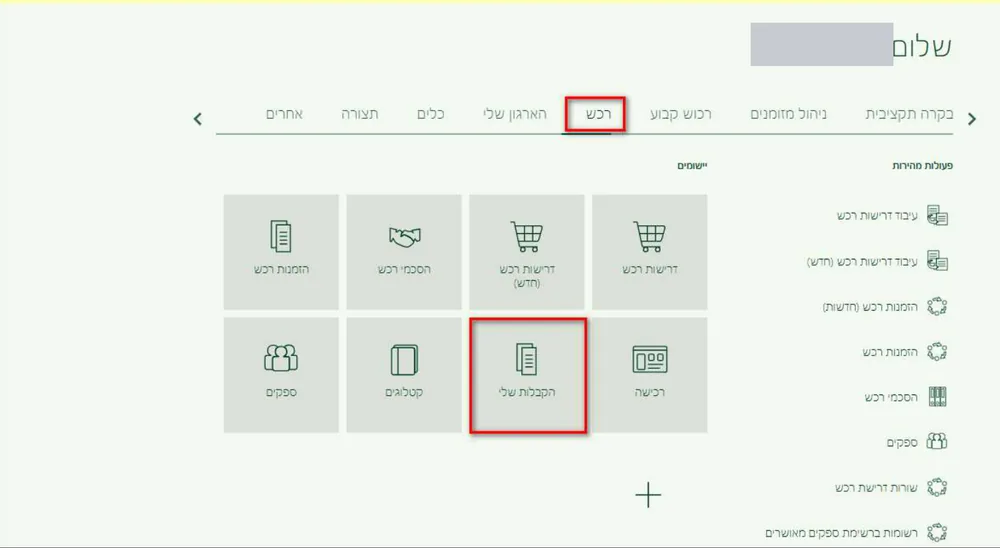
The קבלת פריטים (Receive items) screen opens.
Find the order
Search for the order that arrived, for example by דרישת רכש (Requisition) or הזמנת רכש (Purchase order) number, and click חיפוש (Search). The order lines appear below, under תוצאות חיפוש (Search results).
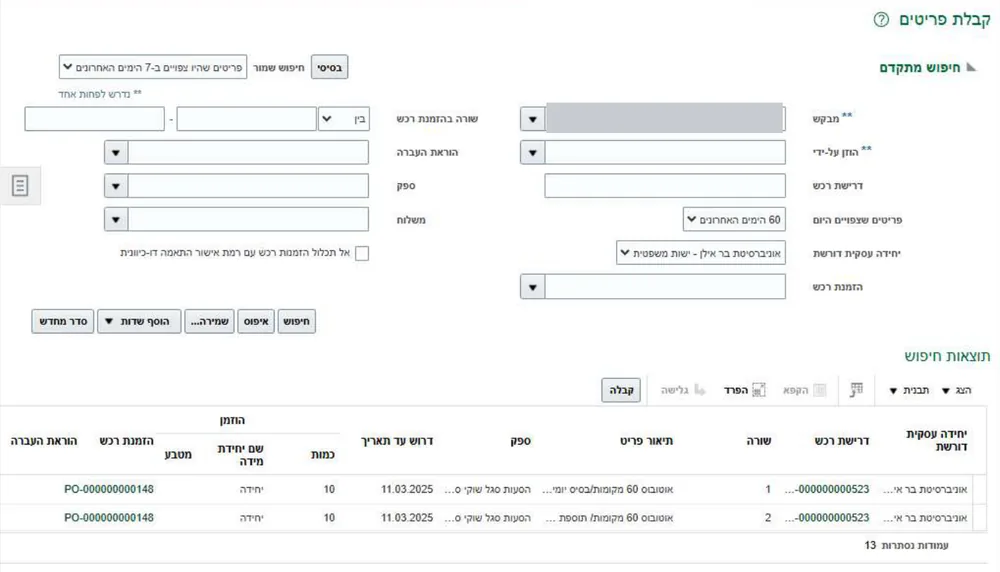
Select lines and click "קבלה"
Select the lines that arrived and click קבלה (Receive). The יצירת קבלות (Create receipts) screen opens.
Several orders at once — You can select lines from several different orders and submit them together. The system creates a separate receipt for each order.Enter what actually arrived
On each line update the כמות שהתקבלה (Quantity received) and the receipt תאריך (Date). If you have them, also add the תעודת משלוח (Delivery note) number, שובר אריזה (Packing slip) and a הערה (Comment).
You can also select a line and choose פעולות (Actions) → ערוך (Edit). In the עריכת שורה (Edit line) panel, update and click אישור (OK).
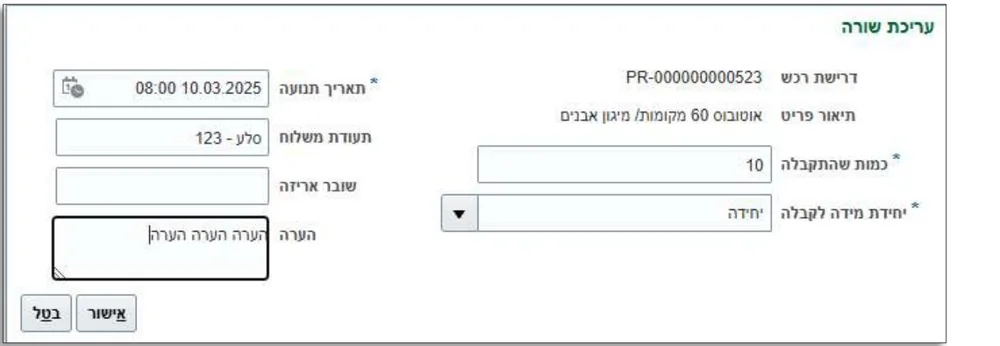 Editing several lines — Select several lines from the same order and click ערוך שורות (Edit lines). What you fill in there (date, delivery note, comment) applies to all the lines you selected.
Submit
Click שלח (Submit). A confirmation message shows the numbers of the receipts created. That's it — the receipt is reported.
Made a mistake? Return or correct
Click רכש → הקבלות שלי → משימות (Tasks) → ניהול קבלות (Manage receipts). Search for the receipt and select the line.
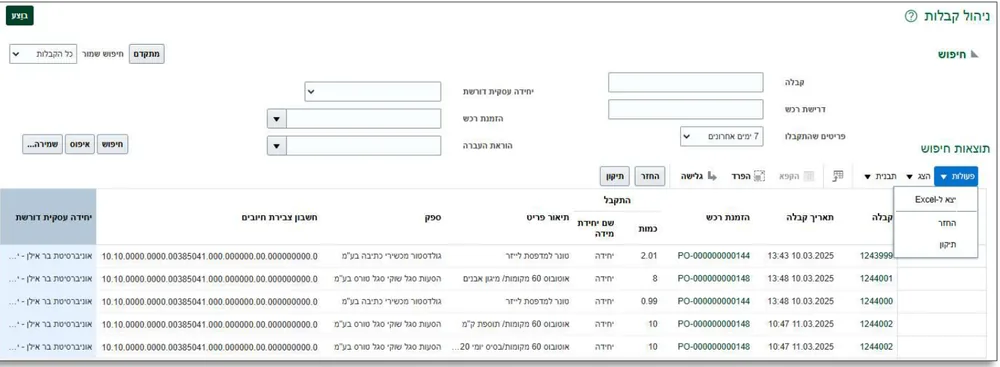
- החזר (Return): when you need to return part of the quantity or the whole receipt (for example, only 7 of 10 arrived). Fill in כמות החזרה (Return quantity), תאריך החזרה (Return date), סיבה (Reason) and הערה, and click שלח.
- תיקון (Correct): to fix a mistake in a receipt. You can change only the כמות (Quantity) and the תאריך התנועה (Transaction date). Make the fix and click שלח.
See what was done on a receipt — On the ניהול קבלות screen click the הקבלה (Receipt) number to open it. The הצגת היסטוריית תנועה (View transaction history) button shows everything done on it: receipt, return and correction.
Updated September 2026